How to Set up Google Analytics 4 (Magento 2, Shopify)

How to Set up Google Analytics 4
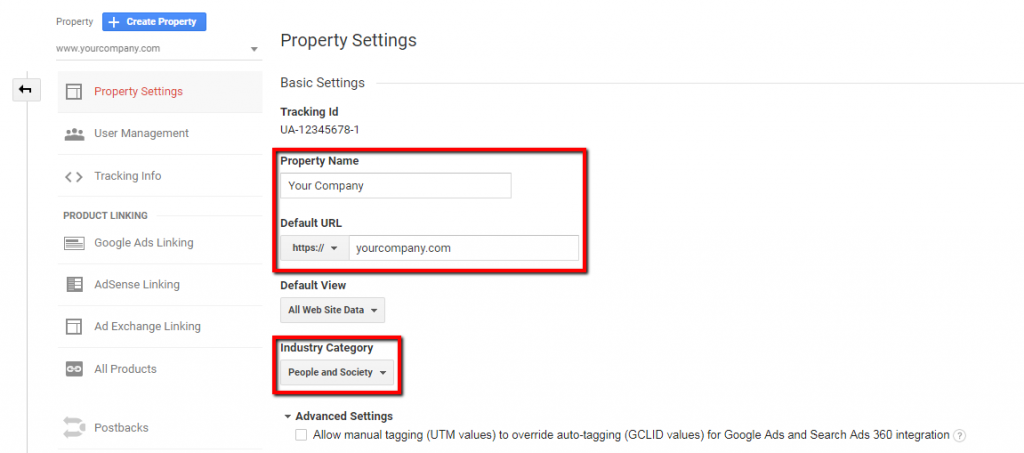
Create a Google Analytics 4 Property
Go to the Google Analytics website (analytics.google.com) and sign in to your Google account.
Click on the "Admin" tab located at the bottom left of the page. Under the "Account" column, click on the drop-down menu and select "Create Account."
Enter your Account Name and select the appropriate data sharing settings.
Under the "Property" column, click on the drop-down menu and select "Create Property."
Enter your Website or App Name and select the appropriate industry category.
Choose your time zone and currency.
Toggle on the "Advanced options" if you want to enable enhanced measurement features.
Click on the "Create" button to create your new property. Once your property is created, copy the Measurement ID that is displayed on the page.
Install the Google Analytics 4 Tracking Code
Log in to your website's content management system (CMS) or website builder.
Navigate to the section of the CMS or website builder where you can edit the website's HTML code.
Paste the Google Analytics 4 tracking code you copied from your Google Analytics 4 property into the HTML code of your website's header.
Save and publish the changes to your website.


Set Up Event Tracking (Optional)
Identify the Events You Want to Track Determine which events you want to track on your website or app. Common examples include button clicks, form submissions, video plays, and downloads. You can track up to 500 different event types in Google Analytics 4.
Set Up Custom Events in Your Google Analytics 4 Property Once you've identified the events you want to track, set them up as custom events in your Google Analytics 4 property. You can do this by navigating to your property's Admin section, selecting "Events" under the "Data Streams" tab, and clicking "Create Event." You'll need to give your event a name, category, and action.
Implement the Tracking Code on Your Website or App To start tracking events, you'll need to add the event tracking code to your website or app. This code should be added to the element that triggers the event you want to track. For example, if you want to track button clicks, you'll need to add the event code to the button element.
Here's an example of what the event tracking code might look like:
<button onclick="gtag('event', 'click', {'event_category': 'Button', 'event_label': 'Learn More'});">
This code would track a button click event with the category "Button" and the label "Learn More."
Set Up User-ID Tracking (Optional)
User-ID tracking is an optional feature in Google Analytics 4 that allows you to track individual users across multiple devices and sessions.
- Enable User-ID Tracking in Google Analytics 4
Go to your Google Analytics 4 property and navigate to the Admin section. Under the "Data Streams" tab, select your web data stream and click on "User-ID settings." Toggle the switch to "On" to enable User-ID tracking. Click "Save" to apply the changes.
- Update Your Website or App's Code
To send the User-ID to Google Analytics 4, you'll need to update your website or app's code. The specific implementation will depend on your platform and development stack, but generally, you'll need to do the following:
a. Collect the User-ID
You'll need to collect the User-ID for each user in a way that is unique and consistent across devices and sessions. This might involve prompting users to create an account or sign in, or using a third-party authentication service like Google or Facebook.
b. Set the User-ID in the Tracking Code
Once you have the User-ID, you'll need to set it in the tracking code that you added to your website or app in step 2. This will require modifying the tracking code to include a line like the following:
gtag('set', {'user_id': 'USER_ID'})
Replace "USER_ID" with the actual User-ID for the current user.
- Ensure Proper Consent and Privacy Policies
User-ID tracking involves collecting personally identifiable information (PII) from users, so it's important to ensure that you have proper consent and privacy policies in place before implementing it. Make sure that your users understand what data you're collecting, how it will be used, and how they can opt out if they choose to. Consult with a legal expert if you're unsure about the requirements for User-ID tracking in your jurisdiction.
Set Up Cross-Domain Tracking (Optional)
If you have multiple domains that you want to track in a single Google Analytics 4 property, you can set up cross-domain tracking. This will allow you to track user activity across different domains and get a better understanding of how users interact with your brand across multiple touchpoints.
Enable cross-domain tracking in your Google Analytics 4 property: a. Go to your Google Analytics 4 property and navigate to the Admin section. b. Under the "Data Streams" tab, select your web data stream and click on "Tagging Settings." c. Toggle the "Cross-domain tracking" switch to "On." d. Enter the domains you want to track, separated by commas. e. Click "Save" to apply the changes.
Update your website's code to send cross-domain tracking data to Google Analytics 4:
Add the following code to your website's tracking code, replacing "example-2.com" with the domain you want to track:
gtag('config', 'GA_MEASUREMENT_ID', {
    'linker': {
        'domains': ['example-2.com']
    }
});
Make sure you add this code to all pages on your website that have the Google Analytics 4 tracking code.
Verify the Setup
Wait for 24-48 hours to allow data to be collected in Google Analytics 4 Verify that data is being collected by checking the Google Analytics 4 dashboard.
Set up google analytics 4 for Magento 2
Create a Google Analytics 4 Property for Magento 2
Go to the Google Analytics website and create a new Google Analytics 4 property
Copy the Measurement ID as you'll need it to set up the Google Analytics 4 extension in Magento 2.
Install the Google Analytics 4 Extension
Download and install the Google Analytics 4 extension for Magento 2:
Go to the Magento Marketplace and find GA4 extension
Or you can find on third-party websites such as Mageplaza


Configure the Extension

Go to your Magento 2 store's Admin Panel and navigate to Stores > Configuration > Sales > Google API.
Under the "Google Analytics 4" section, enter the Measurement ID you copied in step 1 when you created your Google Analytics 4 property.
Save the configuration by clicking on the "Save Config" button at the top right-hand corner of the page.
Set up Google Analytics 4 for Shopify

Create a Google Analytics 4 Property
Go to the Google Analytics website and create a new Google Analytics 4 property
Copy the Measurement ID
Install the Google Analytics 4 Integration
Go to the Shopify App Store and search for the "Google Analytics 4 Integration" app.
Install the app by clicking on the "Add app" button and following the prompts to connect your Shopify store to your Google Analytics 4 property.
Once the app is installed, you'll need to authenticate your Google account by clicking on the "Authenticate with Google" button.
Follow the prompts to sign in to your Google account and grant the app permission to access your Google Analytics 4 property.
Once you've authenticated your Google account, you'll need to select the Google Analytics 4 property you want to use for your Shopify store. To do this, click on the drop-down menu and select the property from the list of available options.
Finally, click on the "Save" button to complete the integration.
Set Up Enhanced Ecommerce Tracking (Optional)
Enable Enhanced Ecommerce tracking in your Google Analytics 4 property by going to the Admin section and selecting "Ecommerce settings" under the "Data Streams" tab.
Toggle on the "Enable Enhanced Ecommerce" setting and click "Save" to apply the changes.
Next, update your Shopify store's settings to enable Enhanced Ecommerce tracking.
Go to your Shopify store's Admin section and navigate to the "Online Store" section.
Select "Preferences" and scroll down to the "Google Analytics" section.
Under "Google Analytics," select "Set up Google Analytics."
In the "Google Analytics 4" section, enter your Measurement ID and select "Enable Enhanced Ecommerce."
Click "Save" to apply the changes.
Set Up Event Tracking (Optional)
Identify the events you want to track in your Shopify store, such as button clicks, form submissions, or video plays.
Set up custom events in your Google Analytics 4 property by going to the Admin section and selecting "Events" under the "Data Streams" tab.
Click on "Create event" and enter a name and description for the event.
Select the "Web" platform and choose "Custom" as the event type.
Define the event parameters, such as category, action, and label.
Click "Save" to create the custom event.
Implement the tracking code on your Shopify store to start tracking events.
